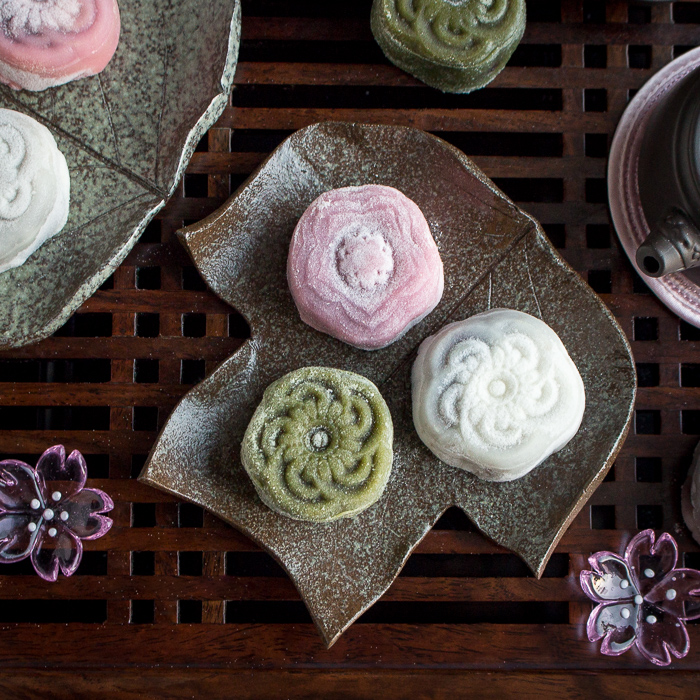
Have you ever eaten a snowy moon cake? Come follow along and we will show you how to make this delicious treat.
A Blast From the Past
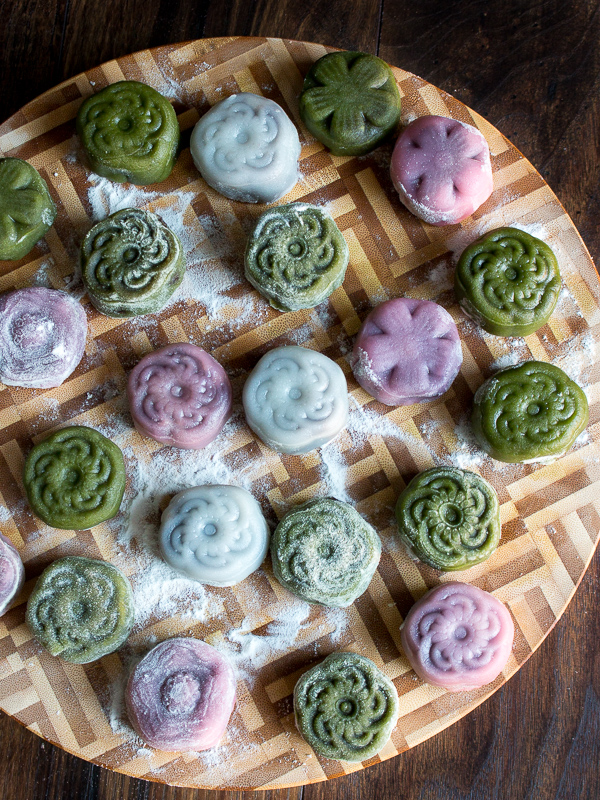
Can you believe we first submitted this Homemade Snowy Moon Cake recipe on September 22, 2012? A special thank you to all of you and for your support through the years. We have perfected the recipe over the years and wanted to share some fun and easy tips. due to sentimental reasons, we decided to keep some of the old photos along with taking some new ones for sentimental reasons. Can you guess which photos are old and which ones are new?

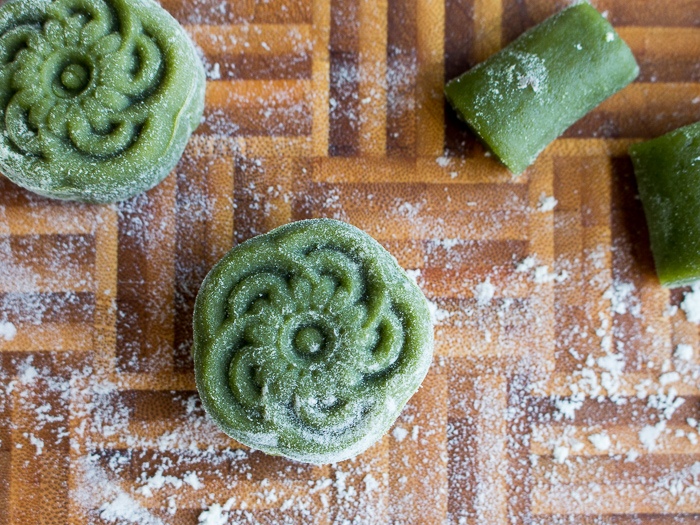
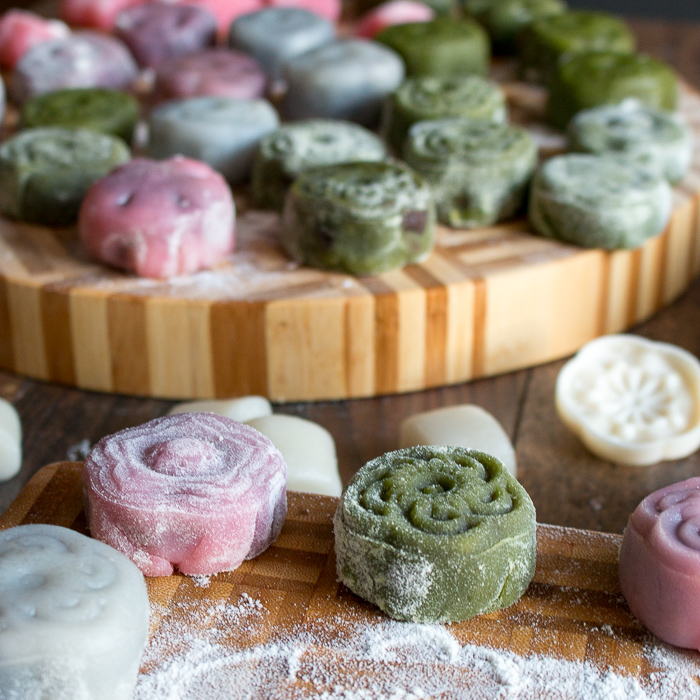
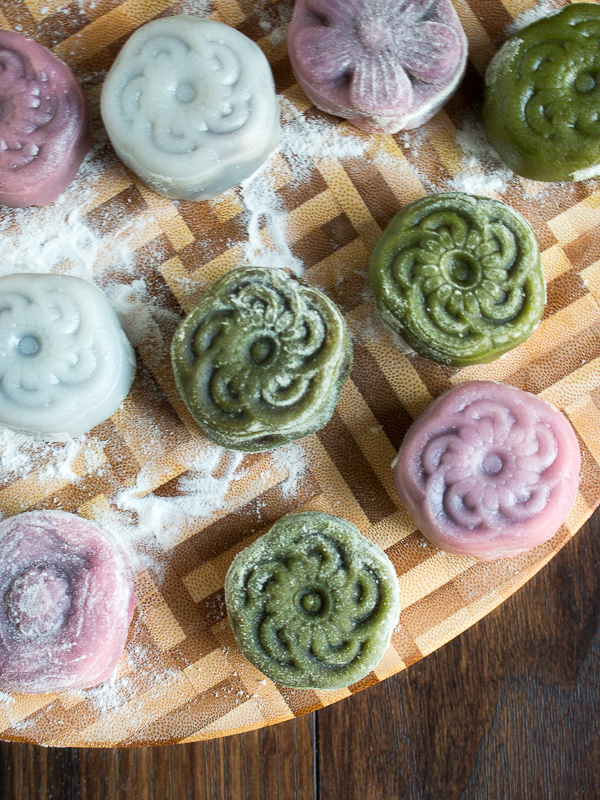
They will bring a smile to your face with their beautiful designs made with the moon cake moulds and moon cake stamps. When you bite into one of these Homemade Snowy Moon Cakes, you are going to love that addictive chewiness of the "mochi like" snowy skin.
Lightly sweetened red bean paste is super smooth on the palate and very nourishing. Adzuki beans are good for your spleen qi. Take a look at our Feed Your Spleen: Nourish Your Body Post for other foods and meal plans that help spleen qi deficiency. You can buy moon cake moulds at Asian Grocery Stores or do like we did and just order your moon cake moulds on Amazon.
12 Reasons to Love Snowy Mooncakes
- Chewy
- Delicately Sweet
- Make Gorgeous Gifts
- Pretty/Cute/Instagram Photo-Op Opportunity
- Gluten - Free
- Dairy - Free
- Vegan
- Portion Control
- Mid-Autumn Festival Treat
- Shaped Like the Full Moon
- Natural Ingredients
- No Dyes
"May we live long and share the beauty of the moon together, even if we are hundreds of miles apart,” says the romantic Chinese poem. These ancient sentiments are still embodied in the way Chinese people celebrate the Mid-Autumn Festival. Does your family celebrate together under the glow of a full moon?
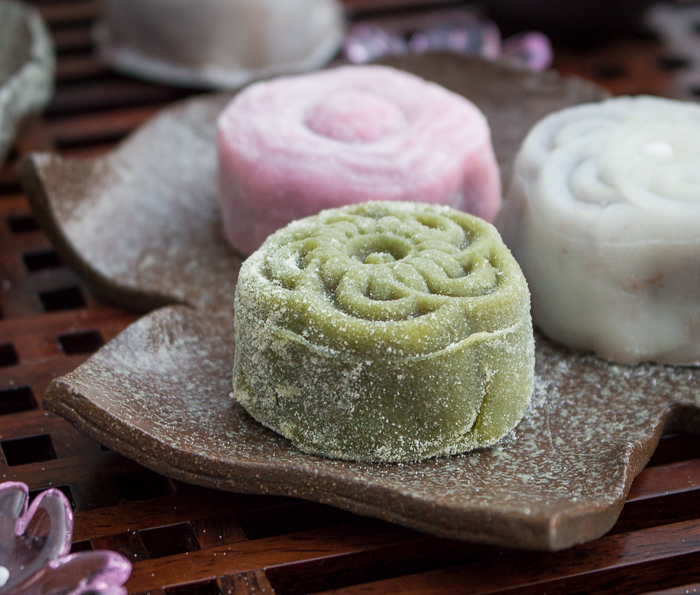
Mid-Autumn Festival celebrates the harvest season. Generally speaking, family and friends gather and think about the family and friends that live far away. A common way to celebrate Mid-Autumn Festival is to share Homemade Snowy Moon Cakes. Do you like to view the moon and spend time with family and friends too? Mooncakes are usually round and shaped like the full moon.
Traditional Mooncakes vs Snow Skinned Mooncakes
In Asia, these are usually store bought regular traditional baked moon cakes with lotus seed paste stuffed with egg yolk or double egg yolk. However, there are also the newer trend of snowy moon cakes also sometimes known as snow skinned moon cakes, crystal snow moon cakes, ice moon cakes or NO-BAKE snowy Moon Cakes. We love the snowy moon cake kind and hope you will too.
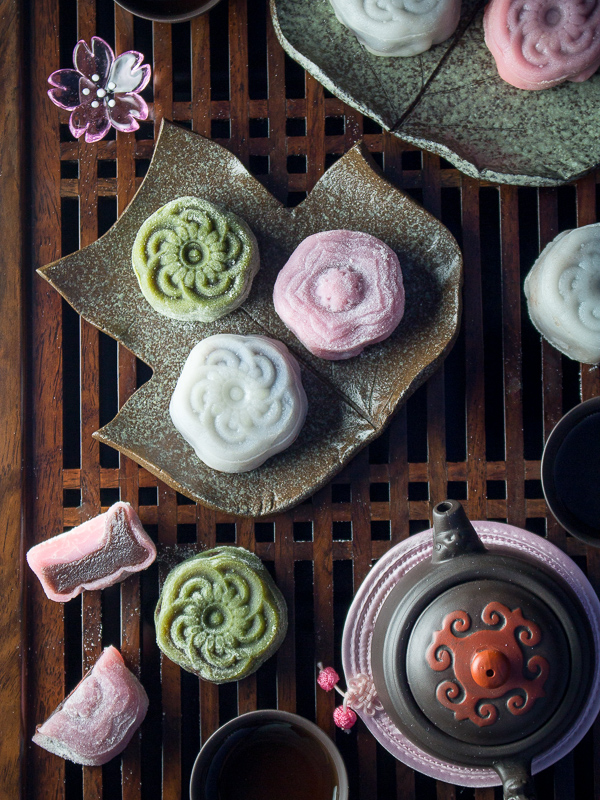
The Chinese have been celebrating Mid-Autumn festival since at least the early Tang dynasty (618 – 907). In the past, people would make offerings of alcohol, fruit and other foods to the moon-god, to express gratitude for a bumper harvest. Today, the festival is now associated more with beautiful lanterns and the eating of moon cakes.
Here in Hong Kong, people are over the moon for mooncakes. In fact, we were almost leveled out. Whilst we were waiting at the bus stop, a delivery man pushing a cart chock full of mooncake boxes lost control of his cart. Thanks to quick reflexes, all moon cakes and all innocent bystanders are A-OK. If your moon cake delivery was on that cart, you can thank us later...
Have you ever noticed one really important trait that transcends all cultures around the world? We all have one very common link. Whenever we gather, there is always food. During the Mid-Autumn Festival, mooncakes are eaten and given as gifts and people are just over the moon for these special cakes.
Make your Own Homemade Snowy Mooncakes
You might be able to find Traditional baked mooncakes in Asian Grocery stores or online around the world. However, you will not be able to find snowy moon cakes as easily. Snowy moon cakes need to be refrigerated or frozen and are difficult to transport around the world. That is exactly why you need to learn how to make your own Homemade Snowy Moon Cakes.
We have invented a super easy way to make the snow skins without locating the difficult to find snowy mooncake powder (special precooked glutinous rice flour - Gao Fen).
Sometimes, people just cook their glutinous rice flour (also known as sweet rice flour) in a dry pan and call it a day. However, for us this leaves an odd uncooked flour taste. However, we really enjoy a good Japanese mochi and used the method in our Mung Bean Daifuku Mochi recipe . We microwaved the homemade snowy moon cake skins for a total of 2 minutes. It worked like a charm. No weird flour taste. Easy peasy microwave method and no laborious steaming on the stovetop. Winner!
If you want to learn about all the different kinds of moon cakes, be sure to check out our Mooncake Mania post. Many of the store bought versions are delicious. However, they have nothing on the homemade snowy moon cakes which are made with only the freshest ingredients.
Moon Cakes of the PAST
In the past, moon cakes had a relatively bad reputation with their high fat and high sugar content. They were usually made with lots of butter or lard and sugar. In addition, they also had lots of extra fat with the egg yolk in the center. Personally, this is not our favorite way to waste our daily allotment of calories.

In more recent times, the Taipan bakery in Hong Kong, around the 1980's, created the snowy skin moon cakes made with glutinous rice skin . The snowy skin mooncakes have a crust similar to that of mochi and they are called snowkin mooncakes or ice skin mooncakes (冰皮 or 冰皮月餅). They have some very unique creamy fillings made with less fat and less sugar.
Here are Healthy World Cuisine, we even took that "Healthyish motto"a step further. We replaced the milk with coconut milk to make it dairy/lactose free. In addition, we removed the wheat starch with potato or corn starch to make it gluten-free. We only used a couple tablespoons of powdered sugar for 16 moon cakes. You can use homemade sweet potato mash without any added sugars.
Portion Sizes Matter
In addition, you can make your own adzuki red bean paste and use stevia to sweeten. However, the biggest change is the portion size. Our moon cake moulds are only about 5 cm or about 2 inches in diameter. They are just a few bites of deliciousness. Everyone deserves a treat once in awhile but please be cognizant of portion size. Size really does matter.

Freeze your Snowy Mooncake Fillings
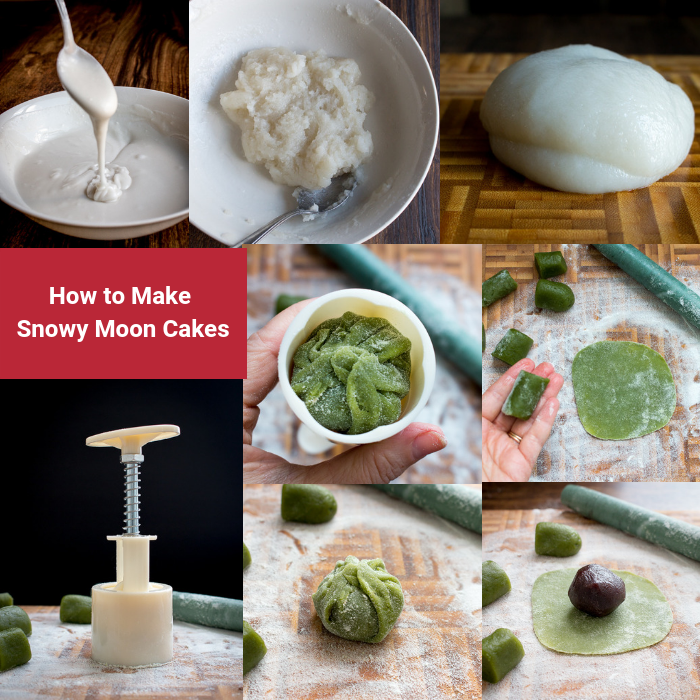
The most important thing to note is that you MUST roll your filling mixture into pre-made balls and then place in the freezer. The purpose of freezing is to make them easier to work with when you are trying to form the snowy skins over the filling.
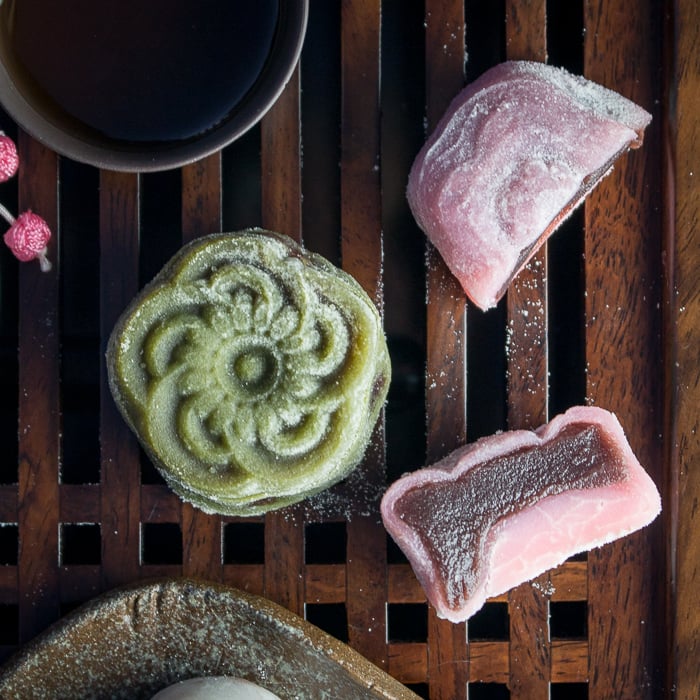
We love making our beautiful homemade snowy moon cakes colorful. Matcha (green Tea) powder is delicious and will make your skins a beautiful green color. A teaspoon of Pomegranate juice made our snowy skins pink. We also like a few plain too. Feel free to add essence to your skins as well like almond extract, rose water or whatever your heart desires. These, of course, are all optional things to try.
Homemade Snowy Moon Cakes
Homemade Snowy Moon Cakes are NO-BAKE moon shaped treats for sharing over Mid-Autumn Festival with "mochi like" skin and stuffed with sweet red bean paste.
Ingredients
Fillings
- 17.6 oz Fine Sweetened Red Bean Paste azuki bean paste
Additions
- ½ cup glutinous rice flour (also called sweet rice flour) - this ½ cup flour is ONLY used to prevent things from sticking. Do not include this in the moon cake skin dough recipe below.
Snowy Moon Cakes
- 50 grams glutinous rice flour (or about ⅓ cup and a tablespoon)
- 35 grams rice flour (or about ¼ cup and 1 teaspoon)
- 20 grams corn starch or potato starch (or about 2 Tablespoons)
- 40 grams powdered sugar (or about ⅓ cup and 1 Tablespoon)
- 180 grams coconut milk canned (or about ¾ cup)
- 18 grams light flavored oil (or about 1 Tablespoon and 2 teaspoons)
- 1 tsp matcha (green Tea) powder or to desired taste/color (OPTIONAL- to make your mooncake skins green color)
- 1 tsp Pomegranate juice 1 teaspoon (OPTIONAL-to give your moon cake skins a light pink color)
Instructions
- Make the filling: Roll your fine sweetened red bean paste into about 28 gram balls or 1 heaping tablespoon. Place on a plate, uncovered and freeze for about 30 minutes (or longer if you wish up to 24 hours in advance). (You can also use sweet potato mash, pumpkin mash, custard paste, lotus paste, ice cream or really anything your little heart desires. The paste must be thick in consistency that you can roll them into balls)
- Add ½ cup of glutinous rice flour in a dry pan. Cook over low medium heat. Stir until it turns a light yellow color. Remove the cooked glutinous rice flour from the pan and allow to cool. Set aside (This glutinous rice flour will be used to prevent things from sticking such as on your rolling pin, your board and in your moon cake press) We cook the glutinous rice flour to remove that raw flour taste.
- Make the moon cake skins: In a medium microwavable bowl, add 50 grams of glutinous rice flour, 35 grams of rice flour, 20 grams of corn starch or potato starch, 40 grams of potato starch, 180 grams of canned coconut milk, 18 grams of light flavored oil. (Optional Step: Add either 1 teaspoon of match green tea powder, if you would like your moon cake skins green in color. If you want your snowy moon cake skins to be light pink in color, then add 1 teaspoon of pomegranate juice concentrate) Stir well. Next, strain this mixture through a strainer to get rid of any little lumps in the mixture.
- Cover your moon cake skin mixture very lightly with a little plastic wrap (saran wrap). Set the microwave on regular high heat and cook for 30 seconds. Be careful the bowl will be hot. Take the mixture out of the microwave and stir well. Place the mixture back in the microwave, cover back up with plastic wrap and cook for another 30 seconds. Remove to stir well again and put it back in the microwave for 2 more sessions of 30 seconds, for a total cooking time in the microwave of 2 minutes. Take your moon cake skin mixture out of the microwave oven and stir. Set aside and allow to cool. Place moon cake skin mixture in the refrigerator to expedite the cooling process.
- Check out the recipe VIDEO at the bottom of the post directions to help you through this process.
- Knead your moon cake skin dough for about 5 minutes until smooth in texture. Your dough will be sticky and little oily. Place just a little of the pan cooked glutinous rice flour on your surface to prevent sticking and knead away. Next roll the dough into a ball. Take your ball and roll into one long rope about 1 inch in diameter. Next cut your rope in half, and then in half again and each section in 4 pieces for a total of 16 pieces.
- Take one of the moon cake skin pieces and roll into a ball. Then with your fingers flatten slightly. Use a small rolling pin and roll out to about 3 inch diameter circle (give or take).
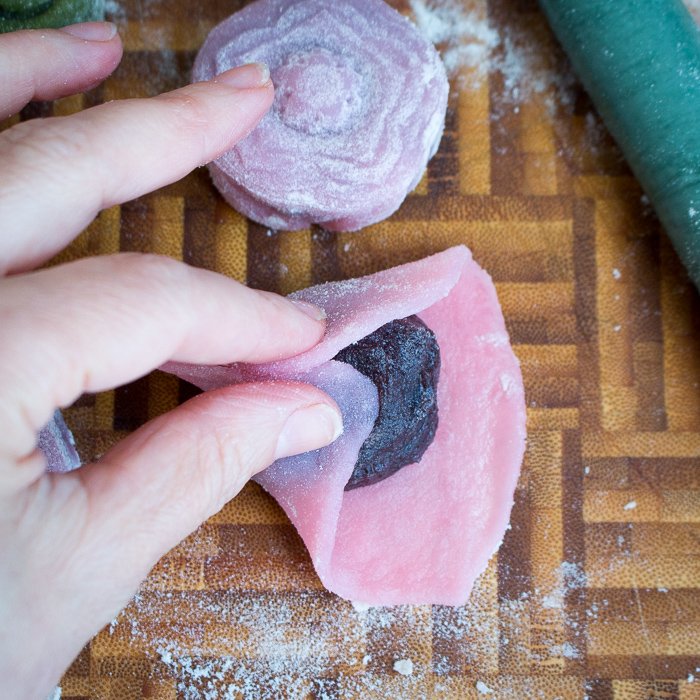
- Place one of your pre- frozen balls of sweetened red bean paste and place in the center of your moon cake skin rolled out circles. First, pull the moon cake skin over the ball of sweetened bean paste and crimp together and do this on all edges so that the frozen ball of sweetened red bean paste is fully covered with the moon cake skin.
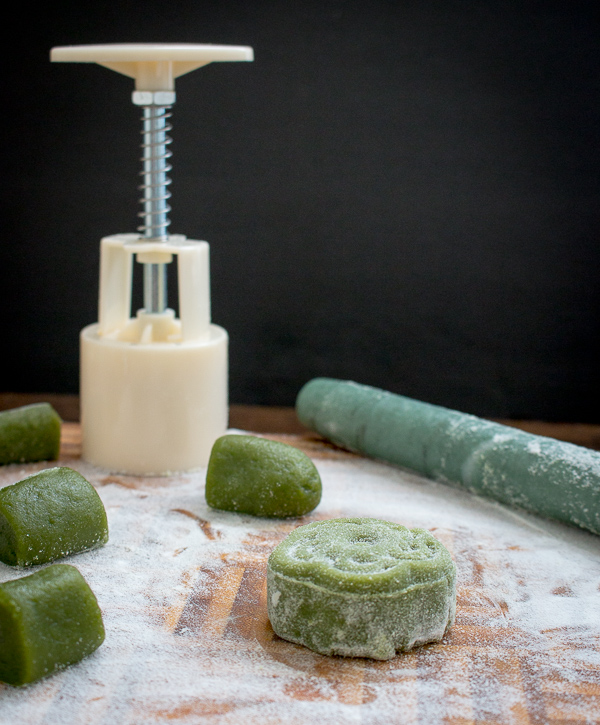
- Our moon cake molds/press is 5 cm or about 2 inches in diameter. We love the little tiny one as they are the perfect little bite for a treat. Assemble your moon cake press per the manufacturers guidelines. Choose the pretty press design of choice and install into press. With ours you just place the little stamp inside and turn right to lock in place. Check your directions for your particular press as they are all different. Flour your moon cake press very lightly with with your pan fried cooked glutinous rice flour.
- Place the smooth side (good side) down into the decorated press and the crimped side (ugly side) facing outward. Hold your fingers on the bottom so your moon cake does not fall out and flip over so that the moon cake press is upright. With gentle but firm pressure, hold the press down to make the pretty design on the moon cake. Gently remove the moon cake from the press. Repeat this process for the remaining 15 moon cake skins and filling.
- Enjoy!
This recipe and image sources are referred in website: Hwcmagazine.com. Thanks so much!
 Asian Recipes


No comments :
Speak Your Mind: