I have spent weeks baking this cheesecake by trying out different recipes and different techniques. Some almost success but some failed miserably, they all taste delicious even they are failed.
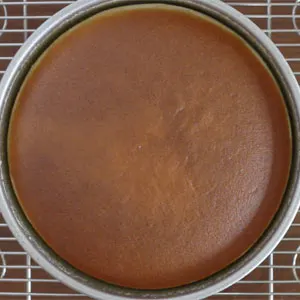
Why do I mean by a “failed” Japanese cheesecake? If you have seen a Japanese cheesecake before, you will know that they are supposed to have a smooth lightly domed surface, straight sides, cottony texture, and moist souffle-like cake crumbs. If they do not have this character on my Japanese cheesecake, it will be classified as a “failed cake”. What a perfectionist I am!

Over the past weeks, I have baked a few failed cheesecakes and some”not-so-perfect” cheesecakes (thanks to all my friends, families and neighbors who are willing to take up all the “not-so-perfect” cakes with a warm welcome, they actually taste as good). I was pessimistic at a point and wonder why my baking buddy Mandy succeeded all the time with a commonly found Japanese cheesecake recipe. No, I am not going to give up, we spent days and nights chatting on the problems and solutions.
Finally, we’ve found out that there is nothing wrong with the recipe; the crack, crumple side and occasional underbaked center issues were all because of my oven! I have an oven that has it’s own character, it will crack the top of the cake by the end of 1/3 baking time. If you have the same experience with the Japanese cheesecake even you have followed to every detail stated in the recipe, don’t feel bad, it could be your oven that failed the cake!
I was totally lost at first but after taking the baking progress time-lapse video with my GoPro camera (ya finally I am utilizing my GoPro camera bought from Amazon), I saw that my cake suddenly rise up and begin to crack at about 45 mins of baking. I then researched other recipes who could give me a hint of this problem and finally I found an appear-to-be-perfect recipe.
As an engineer myself, I trusted that recipe as the author explained the problem from a scientific aspect after all baking is all about chemical reaction. Yes, I am going to try it out, voila, I succeeded in the first attempt, I can’t even believe it when I saw my cake standing there so perfect after coming out from the oven, so beautiful, so professional. I almost cracked into tears, jumping up and down!
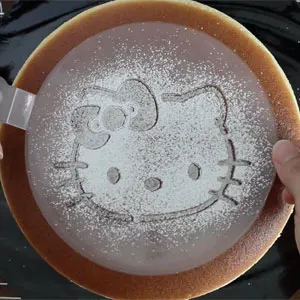
I didn’t stop after I have got the Japanese cheesecake baked perfectly, I baked another few more to prove that I wasn’t just lucky to get it perfected by chance. The success brings lots of courage to me and I decided to make a video to show a summary procedure on how to bake it. Thus, I baked another few more for the video recording. Below are some of the different stencil designs I used to decorate the Japanese cheesecake. They were all successful… Mandy asked me if I ever counted how many Japanese cheesecakes I have baked in total, I think shouldn’t be less than 20 cakes… hahaha
Just in case you haven’t watched the video I posted above. Here are some screens captured from the video:

At 0:07 min

At 1:10 min

At 2:23 min

At 3:43 min

At 4:00 min

Japanese cheesecake is best served after it has cooled down and chilled. Enjoy!
yield: 8" round cake / 12 servings
prep time: 20 minutes
bake time: 48 minutes
chill time: 4 hours
total time: 5 hours 8 minutes
Perfect Japanese Cheesecake/cotton cheesecake recipe for a pillowy soft, light-as-air & heavenly cheesecake. The cake is jiggly (when it is still warm), perfect shape, straight side & no crack top. Includes a quick video on how to bake.
This is the best Japanese Cheesecake recipe that I have ever had.
INGREDIENTS
CREAM CHEESE MIXTURE
- 250 gram Philadelphia cream cheese
- 6 egg yolks (Update: I measured mine, it was about 118g in total for the yolks)
- 70 gram castor sugar (This is half of the total 140 gram)
- 60 gram unsalted butter
- 100 ml full-cream milk or whole milk
- 1 Tbsp lemon juice
- 2 tsp lemon zest
- 60 gram cake flour / superfine flour
- 20-gram cornstarch
- 1/4 tsp salt
- 6 egg whites (Update: I measured mine, it was 264g for the whites of 6 eggs)
- 1/4 tsp cream of tartar
- 70 gram castor sugar (This is half of the total 140 gram)
INSTRUCTIONS
- Pre-heat oven to 200°C / 392°F (Top and bottom heat, no fan force), at least 20 minutes before sending your cake batter into the oven for baking.
- Grease 8″ x 3″ cake pan with butter, line bottom with baking or parchment paper
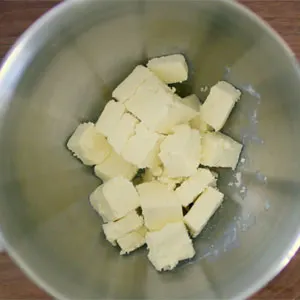
- Whisk cream cheese till smooth over a warm water bath
- Add yolks and whisk
- Add half the sugar (70 gram) and whisk
- Warm milk and butter in microwave (high, 1 min) or stove, whisk into batter
- Add salt, lemon juice, lemon zest, and whisk
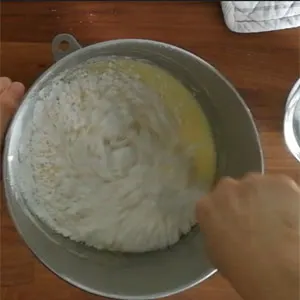
- Remove from the water bath, sift cake flour and corn starch and fold into a mixture
- Whisk egg whites at low speed till foamy
- Add cream of tartar and beat at high speed till bubbles become very small but still visible
- Gradually add the balance of 70 gram of sugar and beat till soft peaks
- Fold whites into batter 1/3 at a time
- Pour into the cake pan and tap the pan on the counter to release air bubbles
- Bake with water bath on the bottommost rack in a preheated 200°C / 392°F for 18 mins, then lower to 140°C / 284°F for another 30 mins (let the heat in the oven to drop gradually with the door closed) and turn off the oven and leave the cake in the closed oven for another 30 mins. Remove water bath and open the door of the oven slightly at the end of the baking for another 30 mins for the cake to cool.
NOTES
Egg – Size: large, I measured mine, it was about 118g in total for the yolks. Separate the yolk and white by using cold eggs. By the time you’ve finished preparing the cream cheese batter, the egg whites are just nice to beat into the meringue.
Cream Cheese – I used Philadelphia throughout all my Japanese cheesecakes, hence, I am not sure how other brands of cream cheese work for this recipe.
Sugar – Caster sugar is slightly finer than fine granulated sugar if you cannot find caster sugar, lightly grind the fine granulated sugar to break them smaller. Do not use powdered sugar as it contained cornstarch.
You may replace 60g of cake flour with 55g All-Purpose Flour + 5g corn starch.
Flavor - You may change the flavor to vanilla by replacing the lemon juice and zest (in the Cream cheese batter) with 1.5 tsp of vanilla extract.
Cake pan – I recommend that you use a 3″ tall non-black round cake pan of an 8″ (maybe this cake pan is a good fit, found in Amazon). If you cannot find a 3″ high cake pan, then replace it with a 9″ round cake pan with at least 2.5″ tall. Use a 1-piece punch-out cake pan, not a springform pan or any other seamed pan.
Grease & Pan Lining – grease the side of the pan with butter and line only the bottom of the pan. If you want to line the side of the pan, please grease the parchment paper after lined.
Batter – the cream cheese batter after adding flours and before folding into meringue should be a little warm, about 40-50 °C.
Meringue is in the soft peak stage, do not overbeat it. I shared a video on my Facebook page about the stage of peaks from the Martha Stewart page, watch it and follow Craft Passion’s Page if you haven’t done so.
Leavening - There is no baking powder in the recipe since it is using the meringue method. DO NOT add any baking powder into your flour.
Cream Of Tartar - Cream of tartar is a natural meringue stabilizer. If you do not have the cream of tartar, replace it with 1/2 tsp of lemon juice.
Meringue folding *** VERY IMPORTANT *** – folding egg white meringue to cream cheese batter needs to be gentle to minimize the deflation of tiny pockets of air in the meringue. Make sure both batter and egg whites are well incorporated and come together.
Batter filling – only fill Japanese cheesecake batter about 15mm (1/2″) from the rim, if you have extra batter (it shouldn’t be a lot left), discard it.
Water bath- Use a roasting pan of about 2″ high and at least 11″ diameter. Place a small towel on it to act as a layer of thin insulation for the cake pan so that the bottom is well protected from direct heat. Fill hot water to about 1″ high after placing the cake pan on the roasting pan and send it into the oven.
Oven – this is crucial and very important. The temperature stated in the recipe is in-oven temperature. Each oven is different so if you are not too sure if the temperature inside your oven is accurate as what you have set at the control panel, get an oven thermometer to check. The brand of my oven is Electrolux (model EOB307X-1), it is measured with 10 °C shies, so I have to set 10 °C higher at my control panel in order to get the required baking temperature.
Cool-down – After the cool-down period with the door closed for 30 mins, I open the oven door to remove the water bath, put the cake back into the oven, and open the oven just a tiny bit (about 10mm). I use a mitten to stop the door from closing back. Removing the water bath is optional but I find that it will prevent the bottom of the cake from being wet by the condensation. *Note: if you want a jiggling cake and do not bother to have a cake with wrinkle top and sides, you may take the cake out without having sitting for this extra 30 mins cool-down time.*
Unmold cake – The cake pan should be able to handle by bare hand after cooling off in the oven with the door slightly open for 30 mins. Use a cake board to cover the cake pan, invert the pan, and carefully remove the pan. Remove the bottom liner and place another cake board or plate on the bottom of the cake, invert it back. The cake should be soft and fluffy and jiggly when it is still warm. Leave it to cool before sending it into the fridge. The final cake size after shrinkage is about 7.5″ x 3″ (highest point)
Cake serving – Decorate the top with snow powder or icing sugar. Cut the cake with a warm knife, wipe the knife clean before the next cut. Buy Hello Kitty Cake Stencil, here (Update: this one has sold out, get the equivalent.) or other designs.
This recipe and image sources are referred in website: Craftpassion.com. Thanks so much!
 Asian Recipes


No comments :
Speak Your Mind: